Kitchen floors take more abuse than any other surface in the home. Cooking grease settles in a fine film across tile and grout. Food particles drop and get ground in by foot traffic. Liquids spill and dry into sticky residue that a regular mop pass barely touches. Over time, even floors that get mopped regularly develop a layer of buildup that routine cleaning doesn't reach.
That's the difference between regular mopping and deep cleaning. Regular mopping maintains a surface. Deep cleaning restores it—lifting the embedded grease, brightening grout lines, and removing the residue that accumulates between the tiles, along the baseboards, and in the corners that standard cleaning routines miss.
The right mop and bucket set makes deep cleaning a kitchen floor genuinely achievable without professional equipment or hours of effort. Here's exactly how to do it.
Why Kitchen Floors Need Deep Cleaning Specifically
Not all floors accumulate the same type of grime, and kitchen floors are uniquely challenging for a specific reason: cooking grease.
Grease doesn't just land on the floor when something spills. Every time food is cooked on a stovetop or in an oven, fine grease particles become airborne and settle across the surrounding area—including the floor directly around and beneath the cooking zone. This happens whether or not there's a visible spill. Over weeks and months, these fine deposits layer on top of each other, bonding to the floor surface and to anything that lands on top of them.
The result is a floor that looks clean after a regular mop pass but feels slightly tacky underfoot, dulls over time despite regular cleaning, and develops darkened grout lines that don't respond to standard mopping.
Grease also changes how dirt interacts with the floor. Debris that would otherwise sit loosely on a clean surface bonds to the grease layer, becoming embedded rather than easily swept or mopped away. This is why kitchen floor cleaning in a home where cooking happens regularly requires a different approach than cleaning a hallway or bedroom floor of similar material.
Deep cleaning breaks the grease cycle. Done properly and regularly—every one to two months in an active kitchen—it prevents the buildup from reaching the point where restoration requires professional intervention.
What You Need Before You Start
Deep cleaning a kitchen floor effectively requires a few specific tools and preparations. Getting these right before starting makes the process faster and the result noticeably better.
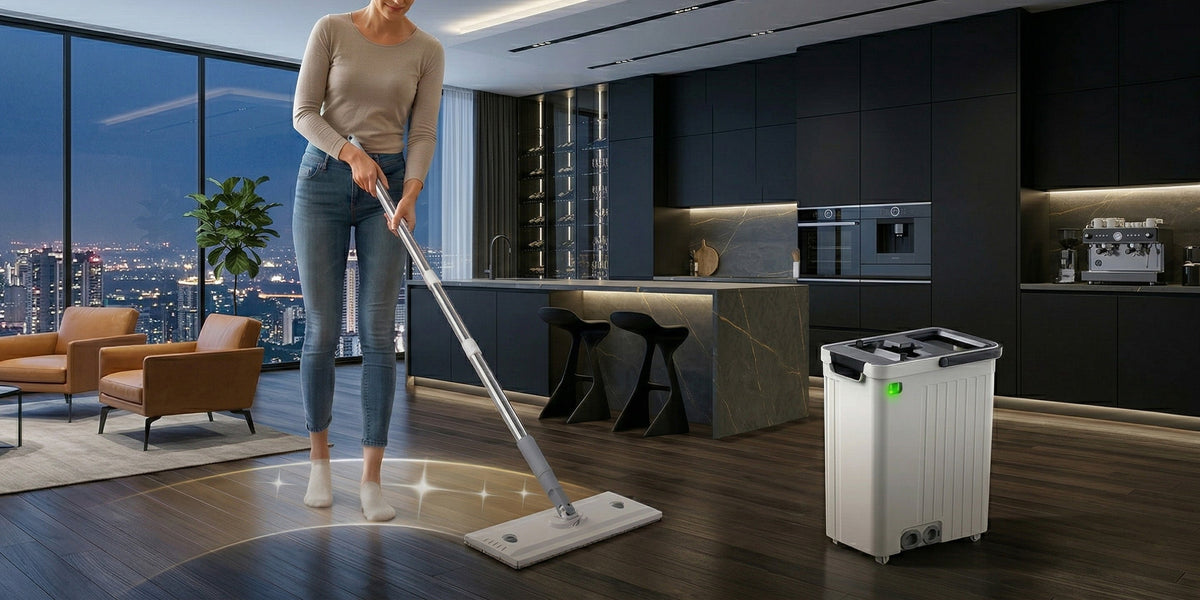
The right mop and bucket set — For kitchen floor cleaning, the bucket system matters as much as the mop. A dual-tank mop and bucket set that keeps clean and dirty water separated is essential for deep cleaning specifically because kitchen floors release significantly more grease and debris than lightly soiled floors. If you're rinsing your mop back into the same water you just used to pick up grease, you're redistributing that grease across the floor on every subsequent pass.
A degreasing floor cleaner — Standard floor cleaner is formulated for maintenance cleaning, not grease removal. For a deep clean, use a product specifically labeled as a degreaser or a heavy-duty floor cleaner appropriate for your floor type. Check that it's compatible with your specific flooring—tile-safe degreasers may not be appropriate for natural stone or sealed hardwood.
A grout brush or stiff bristle brush — The flat mop handles the open floor area. But grout lines, the junction between the floor and baseboards, and corners need targeted scrubbing that a flat mop pad won't adequately address. A dedicated grout brush or narrow stiff bristle brush reaches these areas.
A dry microfiber cloth or pad — For buffing after the mop pass on floors where water spotting is a concern, particularly on darker tile or polished stone.
Protective gloves — Degreasing solutions are more chemically aggressive than standard floor cleaners and warrant skin protection during extended use.
Step 1: Clear and Dry Sweep the Floor Completely
Deep cleaning works on the floor surface, not on top of loose debris. Start by removing everything from the floor—chair mats, pet bowls, kitchen mats, small appliances on the floor—and doing a thorough dry sweep or vacuum pass.
This step matters more for deep cleaning than regular mopping because the degreaser solution you'll apply in later steps will bond to whatever it contacts first. Loose debris on the floor becomes saturated debris that clogs mop pads, contaminates cleaning solution faster, and reduces the effectiveness of the degreaser before it reaches the actual floor surface.
Pay specific attention to corners, along the toe kick beneath cabinets, and the area around and beneath the dishwasher and refrigerator if accessible. These areas collect debris that gets missed in regular sweeping and becomes a significant problem when wet cleaning begins.
Step 2: Pre-Treat Grout Lines and Problem Areas

Before the full mop pass, identify and pre-treat the areas that need more than a mop can deliver: grout lines with visible darkening, the corner where the floor meets the baseboard, and any spots with dried-on residue from spills.
Apply your degreaser directly to these areas and allow it to dwell for the time specified on the product—typically 3 to 5 minutes. This gives the degreaser time to break down the grease and loosen embedded grime before you introduce mechanical action.
While the degreaser is dwelling, use a grout brush to work it into the grout lines with a scrubbing motion. Grout is porous and absorbs grime over time; surface-level cleaning doesn't reach into the pores. The combination of dwell time and mechanical scrubbing is what actually lifts embedded discoloration rather than just cleaning the surface of the grout.
For dried spills or sticky residue patches, apply degreaser directly and cover with a damp cloth for a few minutes before scrubbing. The moisture keeps the degreaser from evaporating before it has time to work.
This pre-treatment step is the most significant difference between a regular mop session and a genuine deep clean. Most of the visible improvement in grout color and floor clarity after a deep clean comes from this step, not from the mop pass itself.
Step 3: Fill Your Mop and Bucket Set Correctly
Fill the clean water tank of your mop and bucket set with warm water and the appropriate amount of degreasing floor cleaner according to the product's dilution instructions. Warm water activates most cleaning solutions more effectively than cold and helps emulsify grease on contact.
A few points specific to deep cleaning that differ from regular mopping:
Use warm, not hot water — Very hot water can cause some floor finishes to expand slightly and increase their porosity, potentially allowing cleaning solution to penetrate into sealed surfaces rather than staying on top. Warm water is effective without this risk.
Don't over-concentrate the solution — More cleaner doesn't mean better cleaning. Excess concentrated cleaner leaves residue on the floor after the rinse pass and can cause the floor to attract dirt faster in the days after cleaning. Follow the dilution ratio on the product label.
Use a fresh mop pad — For deep cleaning, start with a clean, freshly washed microfiber pad. A pad that's already been used for regular cleaning carries residue that will be redeposited on the floor during the deep clean session.
If your mop and bucket set has an electric pump rinse system, ensure the battery is charged before beginning. A deep clean session involves more rinse cycles than regular mopping—kitchen floors release more grime per pass—and consistent rinse performance throughout the session directly affects the result on the final sections of floor.
Step 4: Mop in Sections, Working Toward the Exit
Kitchen floor deep cleaning is most effective when approached systematically rather than randomly. Divide the kitchen floor into logical sections—typically corresponding to zones: the cooking area around the stove, the prep area around counters and the sink, the open traffic area, and the perimeter along cabinets and baseboards.
Start from the section farthest from the kitchen exit and work toward it, so you're never stepping back onto a cleaned section while the floor is still wet.
For each section:
Apply the mop with moderate pressure rather than light surface contact. Deep cleaning benefits from slightly more downward force than maintenance mopping because you're trying to lift embedded grime rather than just pick up surface debris. The microfiber pad needs contact with the floor surface to engage with the contamination below the surface layer.
Work the mop in overlapping passes rather than isolated back-and-forth strokes. Each pass should overlap the previous one by a few inches to ensure full coverage without gaps.
Rinse the mop pad after every two to three passes in a heavily soiled kitchen—more frequently than you would for routine cleaning. Kitchen grease loads mop pads quickly, and a saturated pad transfers rather than removes contamination. With a dual-tank mop and bucket set, each rinse cycle delivers fresh water regardless of how many times you've rinsed—keeping the mop genuinely clean throughout.
Pay close attention to the cooking zone. The floor directly around and beneath the stove typically carries the heaviest grease load in the kitchen and may need additional passes or a direct application of degreaser mid-session for particularly stubborn buildup.
Step 5: Address the Perimeter and Baseboards
The floor-to-baseboard junction is consistently the most neglected area in kitchen floor cleaning and the area where the most significant grime accumulation typically occurs.
A flat mop head reaches along baseboards effectively, but the junction between the floor and the vertical surface needs targeted attention. Apply degreaser along the baseboard line and use a narrow brush or the edge of the mop pad in a deliberate scrubbing motion along the junction. Grime that has accumulated in this channel won't release from a standard mop pass—it needs direct mechanical contact.
For the toe kick beneath kitchen cabinets, a flat mop with a pivoting head can reach underneath if there's sufficient clearance. For very low clearances, a damp cloth applied manually is more effective than trying to force the mop into a space it isn't designed for.
Corner areas where two baseboards meet accumulate grime at a higher rate than straight runs because debris naturally collects there. Use a small brush to work the corner directly after the mop pass.
Step 6: Rinse Pass With Clean Water

After the degreaser mop pass, do a complete rinse pass across the entire floor with clean water only—no cleaning solution.
This step is skipped in regular mopping but is essential in deep cleaning for a specific reason: degreasing solutions left to dry on the floor surface leave a residue film that attracts new dirt faster than a clean floor would. A residue film also reduces the clarity and shine of tile surfaces, creating exactly the kind of dull appearance that prompted the deep clean in the first place.
For the rinse pass, empty the dirty water tank, refill the clean water tank with fresh warm water only, and install a second clean mop pad if available. Mop the entire floor in the same systematic pattern as the cleaning pass, rinsing the pad frequently.
This is where a dual-tank mop and bucket set with sufficient tank capacity demonstrates its value most clearly. The rinse pass requires genuinely clean water from start to finish—any contamination in the rinse water gets deposited on the floor and dries there. A clean-water-only tank that has never been exposed to dirty water delivers this. A single-bucket system that was used for the cleaning pass cannot.
Step 7: Dry the Floor Properly
After the rinse pass, the floor should be only slightly damp—not wet. If there's visible standing water in any area, the mop pad is oversaturated and needs to be wrung more thoroughly before the next pass.
For tile floors in kitchens with good ventilation, air drying is typically sufficient. Open windows or run the range hood fan to increase airflow and accelerate drying.
For darker tile, polished stone, or any floor surface where water spotting is a concern, a dry microfiber cloth or pad buffed over the surface immediately after the rinse pass prevents water marks from forming as the floor dries.
Do not walk on the floor until it's fully dry. Foot traffic on a damp floor after deep cleaning deposits new contamination immediately and can reintroduce grime into grout lines that were just cleaned.
Step 8: Clean Your Equipment After Use
Deep cleaning deposits significantly more grime into your mop and bucket than regular mopping. Cleaning the equipment after a deep clean session ensures it's ready for effective use next time and prevents odor and bacterial growth in the equipment itself.
Remove the mop pad and machine wash it immediately—don't leave a heavily soiled pad sitting damp in the equipment. Wash without fabric softener to preserve the microfiber's cleaning properties.
Empty both tanks of the mop and bucket set completely and rinse each compartment with clean water. Leave the bucket open to air dry fully before storage. A closed, damp bucket develops odor quickly—particularly after a grease-heavy kitchen deep clean.
Wipe down the exterior of the bucket, the mop handle, and the rinse chamber with a damp cloth. Grease and cleaning solution that dries on the equipment exterior can become difficult to remove if left between sessions.
How Often Should You Deep Clean Kitchen Floors?
The right frequency depends on how actively the kitchen is used.
Active kitchen (cooking most days): Deep clean every four to six weeks. Grease accumulation in high-use kitchens progresses quickly, and waiting longer allows buildup to reach the point where a single deep clean session is insufficient.
Moderate use kitchen (cooking several times per week): Every six to eight weeks is typically sufficient to stay ahead of grease and grime accumulation.
Light use kitchen: Every two to three months, with thorough regular mopping between sessions to maintain the surface.
Between deep cleans, regular mopping with a dual-tank mop and bucket set maintains the baseline cleanliness achieved by deep cleaning sessions. The key is not allowing grease to accumulate unchecked between deep cleans—a well-maintained kitchen floor requires significantly less effort to deep clean than one that has been neglected.
Common Kitchen Floor Deep Cleaning Mistakes
Using the same dirty water for the full session — The single most common mistake. By the time you're halfway through a kitchen deep clean with a single-bucket system, the water is heavily contaminated with grease and debris. Every subsequent pass redistributes this contamination. A dual-tank system with clean-water separation eliminates this entirely.
Skipping the pre-treatment step — Mopping over grease-embedded grout without pre-treating with degreaser produces minimal improvement in grout color or surface clarity. The pre-treatment dwell time is what actually lifts embedded contamination.
Not rinsing after the cleaning pass — Degreaser residue on the floor attracts new dirt immediately after the floor is walked on, undoing much of the improvement from the deep clean. The rinse pass is not optional.
Oversaturating the floor — More water doesn't mean cleaner. Excess moisture on tile grout can temporarily loosen surface grime while driving it deeper into porous grout material. Controlled moisture application with a well-wrung microfiber pad is more effective than heavy saturation.
Neglecting the perimeter — The majority of embedded grime in most kitchens sits along the baseboard line and in corners. A mop pass through the open floor area without addressing the perimeter leaves the areas with the most accumulated contamination untouched.
The Bottom Line
Deep cleaning a kitchen floor properly requires more than a regular mop session with stronger cleaner. It requires a systematic approach—pre-treating embedded grime, working in sections, rinsing with truly clean water, and addressing the perimeter areas that routine cleaning misses.
The right mop and bucket set makes every step in that process more effective. Clean-water separation ensures the rinse pass actually rinses. Large tank capacity covers the full kitchen without water changes mid-session. Machine-washable microfiber pads restore to full performance between sessions. And consistent electric-pump rinse cycles keep the mop genuinely clean throughout a session that loads the pad significantly harder than regular mopping.
Kitchen floor cleaning at this level isn't about cleaning more often—it's about cleaning correctly when it counts. A proper deep clean every four to six weeks, supported by regular maintenance mopping between sessions, keeps kitchen floors in a condition that routine cleaning alone never achieves.
Frequently Asked Questions
How do I remove grease buildup from kitchen floor tiles? Pre-treat affected areas with a dedicated floor degreaser and allow it to dwell for 3–5 minutes before scrubbing grout lines with a stiff brush. Follow with a mop pass using a dual-tank mop and bucket set that rinses the mop with clean water throughout, so grease lifted in early passes isn't redistributed in later ones.
How often should kitchen floors be deep cleaned? In actively used kitchens, every four to six weeks prevents grease from accumulating to the point where restoration becomes difficult. Moderate-use kitchens can extend this to every six to eight weeks with thorough regular mopping between sessions.
Can I use a regular mop and bucket for deep cleaning kitchen floors? A single-bucket system significantly limits deep cleaning effectiveness because the rinse water becomes contaminated early in the session. A dual-tank mop and bucket set that keeps clean and dirty water separated maintains rinse water quality throughout, which directly affects how clean the floor gets across the full session.
What's the best floor cleaner for kitchen grease? Use a product specifically labeled as a degreaser or heavy-duty floor cleaner, diluted according to the product instructions. Avoid over-concentrating, as excess cleaner leaves residue that attracts new dirt faster after cleaning.
Why do my kitchen floor grout lines still look dark after mopping? Regular mopping cleans the surface of grout but doesn't penetrate the porous material where embedded grime accumulates. Pre-treating grout lines with degreaser and scrubbing with a dedicated grout brush before mopping is necessary to lift discoloration from within the grout itself.
How do I clean under kitchen cabinets and along baseboards? A flat mop with a pivoting head reaches under low cabinet toe kicks if clearance allows. For the floor-to-baseboard junction, apply degreaser along the line and scrub with a narrow brush before the mop pass. These areas accumulate grime at a higher rate than open floor areas and need targeted attention in every deep clean session.
The ADICOM Mop and Bucket Set combines dual-tank clean water separation, an electric pump rinse system, and machine-washable microfiber pads—everything a proper kitchen floor deep clean requires, in one complete system. See the full setup here.